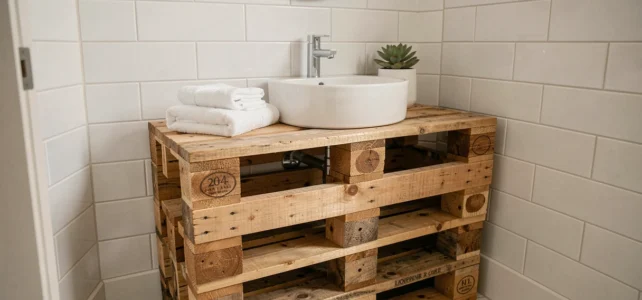
Recovering pallets to make a bathroom vanity is appealing due to its almost zero cost and raw finish. Before diving in, a thorough sorting of the wood and preparation suited to the room’s humidity are crucial for the longevity of the result. Here are the technical points to master to carry out this project without unpleasant surprises.
Pallet Marking: The Sorting That Determines the Whole Project
Recovery tutorials rarely mention the marking printed on the blocks of the pallet. Yet, this is the first step to take before touching a crowbar.
The HT marking (Heat Treatment) indicates thermal treatment: the wood has been heated to eliminate harmful organisms. It is the only marking clearly compatible with indoor use, especially in a humid room.
The MB marking indicates treatment with methyl bromide, a biocide to avoid for any furniture intended for a living space. Colored pallets (blue, red) often belong to industrial deposit circuits and may have received undocumented chemical treatments.
It’s better to steer clear of them. For those who want to make a durable bathroom vanity, this initial sorting prevents the introduction of undesirable substances into a room where steam is breathed in daily.
- Pallet marked HT: usable indoors, suitable for a bathroom vanity.
- Pallet marked MB: treated with methyl bromide, to be excluded from any domestic project.
- Pallet without marking or colored: uncertain origin, unquantifiable chemical risk.
Once the right pallets are identified, let them dry indoors for several days if the wood feels damp to the touch. Dismantling is then cleaner on stabilized wood.

Waterproofing the Pallet Wood in a Humid Room
Applying a varnish to the visible side of the furniture and considering the job done is the most common mistake. In a bathroom, humidity attacks the wood from all sides, including those that are not visible: the back pressed against the wall, the underside in contact with potential splashes, the inside of the cabinet.
A waterproofing treatment must cover every surface, every edge, every end of the board. Low-emission labeled products are well-suited for this use. A minimum of two coats, with light sanding between passes, allows the protective film to last over time.
The Underestimated Role of Ventilation
Even properly treated wood deteriorates prematurely if the room lacks ventilation. Without an effective ventilation system, the risk of swelling and mold increases significantly, regardless of the care taken with the finish. Before building the furniture, check that your bathroom has a functional air extraction system. A water room without mechanical ventilation turns any wood into a sponge in a few months.
Construction Plan and Dimensions Around the Sink
The sizing of the furniture depends on two constraints: the size of the sink to be installed and the necessary margins around it. The sink must rest on a sufficiently wide surface to absorb water splashes without them running directly onto the raw wood edges.
For the structure, the principle remains simple: four vertical posts (the legs), two horizontal frames (top and bottom) connected by corner brackets, and a top made of pallet boards adjusted edge to edge. The metal brackets ensure rigidity where simple wood-to-wood screwing may eventually be affected by ambient humidity.
Cutting and Drilling for the Undermount Sink
If you opt for an undermount sink, drilling the top requires a set of hole saws suitable for the diameter of the drain, followed by cutting with a jigsaw for the main opening. Trace the template provided with the sink directly onto the assembled top, centering it well.
For a drop-in sink, the top remains solid. Only the passage for the drain and siphon requires drilling. This option simplifies manufacturing and limits areas where water can infiltrate the wood.
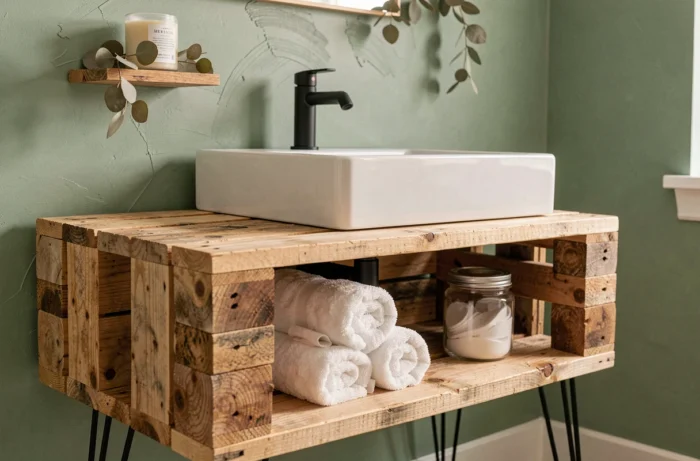
Electrical Compliance Around the Pallet Vanity
Pallet DIY tutorials rarely mention electrical regulations, yet this is a compliance point that should not be overlooked. The NF C 15-100 standard defines safety volumes around water points in a bathroom. A vanity located in close proximity to a socket or switch may pose a problem if these elements are in a prohibited volume.
Before fixing the furniture in its final location, identify volumes 0, 1, and 2 around the water point. A light fixture integrated into the furniture or a socket added next to the mirror must respect these distances and the associated protection indices. In case of doubt, an electrician can check compliance in a few minutes.
Finishing and Customizing the Pallet Furniture
The choice of finish directs the style of the furniture. A clear matte varnish preserves the raw wood look and the natural imperfections of pallet wood. A tinted stain can bring the appearance closer to that of a more noble wood, such as teak or oak.
Careful sanding before any finish determines the final result. A medium grit for roughing, then a fine grit for smoothing: two passes are sufficient on pallet wood, which remains a soft material. Pay attention to the edges and corners to avoid splinters in a room where people walk barefoot.
Adding drawers or internal shelves transforms a simple box into functional furniture. Ball-bearing slides adapt well to pallet structures, provided the posts are perfectly square. Check the squareness at the time of assembly, not after.
A well-built pallet vanity lasts several years in a properly ventilated bathroom. HT marked wood, treated on all its faces and protected from stagnant moisture, ages with a character that melamine panels cannot replicate. The only real limit remains the rigor of the initial preparation.